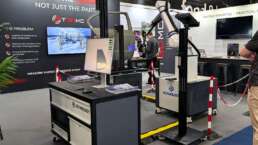
The T3DMC team have previously been to demonstrations where many businesses were unaware of how photogrammetry works and in some cases what photogrammetry is at all.
However, following short demonstrations and discussions about photogrammetry by the team, businesses recognise how powerful it could be for their workflows going forward and for the flexibility of being able to measure very small and very large parts with greater accuracy.
What is photogrammetry?
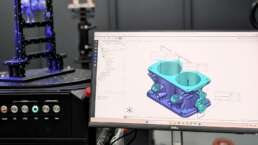
Photogrammetry is the science and technology of obtaining reliable information about physical objects through the process of recording, measuring, and interpreting photographic images (2D imagery).
What tools are used?
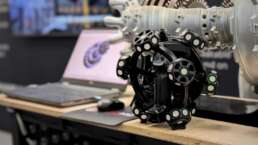
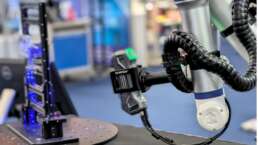
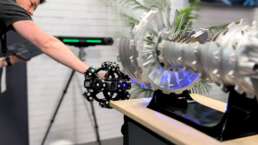
There are different tools that exist within a photogrammetry system. A very basic principle of photogrammetry is ‘known information’ within a 2D image. Magnetic barcodes are applied to the surface to be scanned, which can then be captured by the handheld scanning device with integrated photogrammetry. A critical part of the process is using a scale. Typically, T3DMC would use calibrated ISO 17025 calibrated carbon fibre scale bars. Scale bars are a ‘known’ nominal distance that can be cross checked against and are the element that increases accuracy during a photogrammetry project.
Why is photogrammetry important?
It’s important to understand that photogrammetry captures a larger field of view than 3D scanning and because of this, it can more accurately capture reference markers used for 3D scanning services. It does this by increasing and varying the angle at which the camera sees the reference markers and the barcodes. As it’s a singular camera, which by definition is not locked to a stereo camera setup, it can move around more independently of the other camera position. This makes the calculation of all the points more stable.
Additionally, because the measurement volume is larger on a photogrammetry system, a larger scale can be introduced into the measurement – which are the reference carbon fibre scale bars.
Larger scale bars in a measurement of any kind will translate into a greater accuracy for that overall project because there is a larger known size within the measurement project. For example, if you use a one-meter part and have a one-meter scale bar, it will be a very accurate representation of scale. On the other hand, using a 10-millimetre scale bar in a one-meter project would not be very accurate. And this principle can be linearly extrapolated up to a much larger size.